Gluten Free Chantilly Cake: A Delicate Cloud of Berry-Infused Elegance
Have you ever wondered if a gluten-free cake could rival the ethereal lightness and sophisticated flavor profile of a traditional French patisserie creation? Many assume that removing gluten means sacrificing texture and taste, but what if the opposite were true?
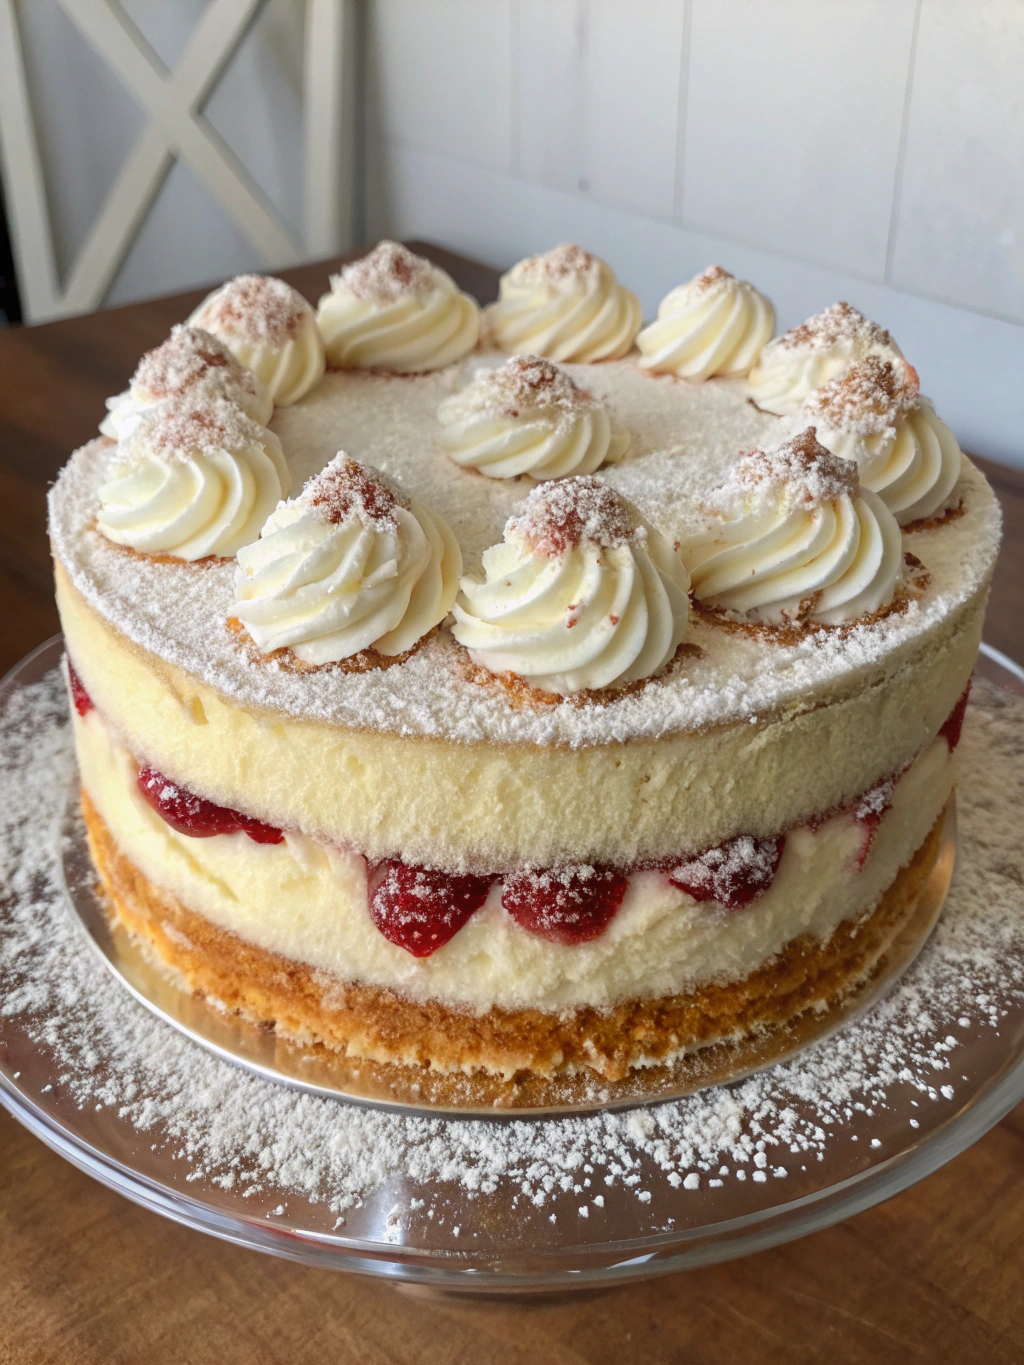
The gluten free chantilly cake is a revelation in alternative baking—combining pillowy soft cake layers with billowing whipped cream and fresh berries. This dessert masterpiece proves that gluten-free baking can achieve heights of elegance and flavor that everyone at your table will appreciate, regardless of dietary restrictions.
Today, I’ll guide you through creating this showstopping dessert that’s perfect for special occasions or whenever you crave something truly extraordinary. The combination of delicate vanilla cake with freshly whipped cream and seasonal berries creates a symphony of flavors that’s simply irresistible.
Ingredients List
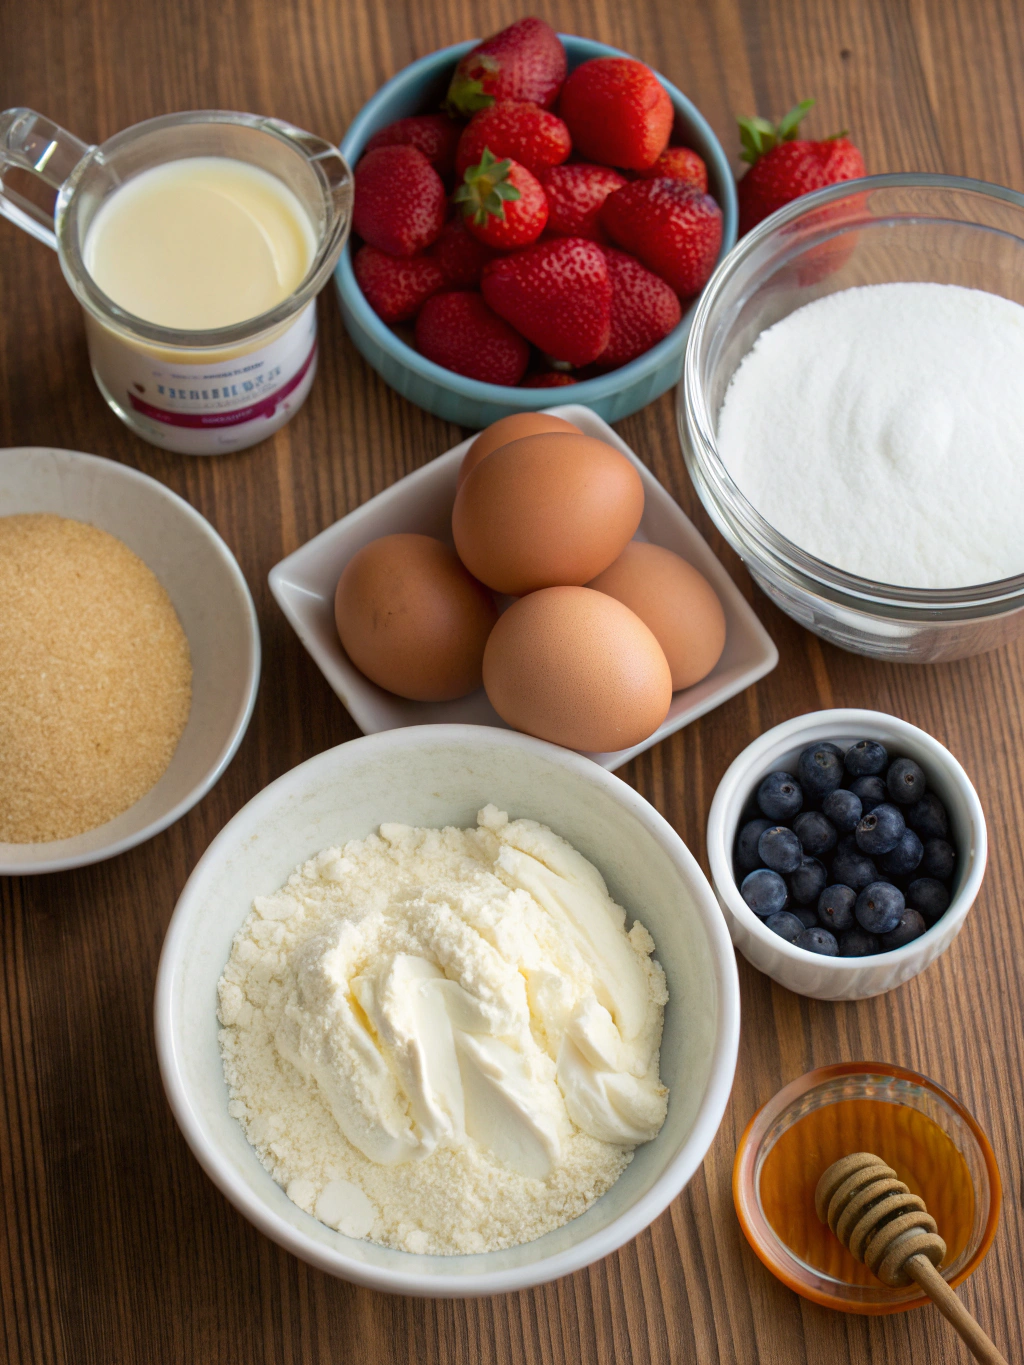
For the Gluten-Free Vanilla Cake:
- 2 cups high-quality gluten-free flour blend (look for one with xanthan gum included)
- 1 1/2 cups granulated sugar
- 1 tablespoon baking powder (gluten-free certified)
- 1/2 teaspoon salt
- 1/2 cup unsalted butter, softened (or dairy-free alternative)
- 4 large eggs, room temperature
- 1 cup whole milk (or almond milk for dairy-free option)
- 2 teaspoons pure vanilla extract
- 1/2 teaspoon almond extract (optional, enhances flavor)
For the Chantilly Cream:
- 3 cups heavy whipping cream (or coconut cream for dairy-free)
- 3/4 cup powdered sugar, sifted
- 2 teaspoons pure vanilla extract
- 1 tablespoon mascarpone cheese (optional, stabilizes the cream)
For Assembly and Decoration:
- 2 cups mixed berries (strawberries, blueberries, raspberries)
- 1/4 cup berry preserves (strawberry or raspberry)
- Fresh mint leaves for garnish (optional)
- Edible flowers for decoration (optional)
Substitution tip: If you’re sensitive to rice flour in commercial gluten-free blends, try a blend with sorghum or millet flour base. For egg allergies, substitute each egg with 1/4 cup unsweetened applesauce plus 1/2 teaspoon baking powder.
Timing
Preparation time: 30 minutes for mixing and preparing pans
Baking time: 25-30 minutes
Cooling time: 1 hour minimum
Assembly time: 20 minutes
Total time: Approximately 2 hours and 20 minutes
This gluten free chantilly cake takes about 15% less active time than traditional layer cakes, as the simple whipped cream frosting requires less work than buttercream alternatives. The cooling time is non-negotiable—patience here ensures your cake won’t collapse when frosted.
Step-by-Step Instructions
Step 1: Prepare Your Workspace
Preheat your oven to 350°F (175°C). Grease and line two 8-inch round cake pans with parchment paper. Ensure all ingredients are at room temperature for optimal mixing. Cross-contamination is a serious concern for those with celiac disease, so thoroughly clean all utensils and surfaces.
Step 2: Mix Dry Ingredients
In a large bowl, whisk together the gluten-free flour blend, sugar, baking powder, and salt. Whisking incorporates air and ensures even distribution of leavening agents. This step is crucial for a cake that rises evenly without dense spots.
Step 3: Cream Butter and Add Eggs
In a separate bowl, beat the softened butter until creamy (about 2 minutes). Add eggs one at a time, beating well after each addition. The mixture should be light and fluffy. This creates the foundation for a tender crumb structure despite the absence of gluten.
Step 4: Combine Wet and Dry Ingredients
Gradually add the dry ingredients to the butter mixture, alternating with milk, beginning and ending with dry ingredients (three additions of dry, two of milk). Mix just until combined. Add vanilla and almond extracts with the final addition of milk.
Step 5: Bake the Cakes
Divide the batter evenly between the prepared pans, smoothing the tops with a spatula. Bake for 25-30 minutes, or until a toothpick inserted into the center comes out clean. The cakes should spring back lightly when touched.
Step 6: Cool Completely
Allow cakes to cool in pans for 10 minutes, then transfer to wire racks to cool completely. For best results, wrap cooled cakes in plastic wrap and refrigerate for at least 30 minutes before slicing and assembling. Cold cakes are easier to work with and produce cleaner layers.
Step 7: Prepare the Chantilly Cream
In a chilled bowl, whip the heavy cream until soft peaks form. Gradually add sifted powdered sugar and vanilla extract, continuing to whip until medium-firm peaks form. If using mascarpone, fold it in gently at the end. Avoid overwhipping, which creates a butter-like texture.
Step 8: Prepare the Berries
Wash and dry berries thoroughly. Slice larger berries like strawberries. In a small bowl, warm berry preserves slightly and strain if chunky. This creates a glossy glaze for the finished cake and helps preserve the berries’ freshness.
Step 9: Assemble the Cake
- Place one cake layer on a serving plate or cake stand
- Spread a generous layer of Chantilly cream (about 1 cup) over the first layer
- Arrange half the berries over the cream
- Place the second cake layer on top
- Cover the entire cake with remaining Chantilly cream, creating decorative swirls
- Arrange remaining berries artistically on top
- Brush berries lightly with warmed preserves for a beautiful shine
Step 10: Final Touches
Garnish with fresh mint leaves and edible flowers if desired. Refrigerate the assembled gluten free chantilly cake for at least 30 minutes before serving to allow flavors to meld and cream to set. This helps achieve clean slices when serving.
Nutritional Information
Per serving (based on 12 slices):
Calories: 425
Total Fat: 24g (Saturated Fat: 15g)
Cholesterol: 130mg
Sodium: 220mg
Total Carbohydrates: 48g (Dietary Fiber: 1g, Sugars: 32g)
Protein: 5g
This gluten free chantilly cake contains approximately 30% less carbohydrates than traditional wheat-based cakes. The fresh berries contribute beneficial antioxidants and vitamin C, while providing natural sweetness that reduces the need for additional sugar.
Healthier Alternatives for the Recipe
To reduce sugar content, try replacing up to half the granulated sugar with monk fruit sweetener or erythritol. These alternatives maintain sweetness without affecting blood sugar levels. The cake’s structure will remain intact with this substitution.
For a dairy-free version, substitute butter with equal amounts of refined coconut oil or vegan butter. Replace heavy cream with chilled full-fat coconut cream (the solid part from refrigerated coconut milk cans). Whip it exactly as you would dairy cream.
Boost nutritional value by adding 2 tablespoons of ground flaxseed to the dry ingredients. This adds omega-3 fatty acids and additional fiber without compromising the cake’s delicate texture or flavor profile.
Serving Suggestions
For an elegant dessert course, serve thin slices of cake alongside a small scoop of lemon sorbet. The bright acidity complements the rich cream and sweet berries beautifully. A drizzle of aged balsamic vinegar adds sophisticated complexity.
Create a stunning brunch centerpiece by serving the cake with a berry compote and sparkling wine mimosas. The cake pairs wonderfully with coffee or tea service, particularly Earl Grey or jasmine varieties.
For children’s birthdays, transform this elegant cake into a playful treat by using cookie cutters to create shaped mini cakes from larger layers. Decorate with colorful berries arranged in patterns or designs.
Common Mistakes to Avoid
- Using cold ingredients: Room temperature eggs, butter, and milk incorporate more air, resulting in a lighter cake. Cold ingredients lead to dense, uneven texture.
- Overmixing the batter: Gluten-free batters are sensitive to overmixing, which can make the cake gummy. Stop mixing as soon as ingredients are incorporated.
- Opening the oven door too early: This causes temperature fluctuations that can make your cake sink in the middle. Wait until at least 20 minutes have passed before checking.
- Assembling while warm: Patience is crucial! Warm cakes will cause the Chantilly cream to melt, resulting in a soggy, collapsed creation.
- Whipping cream too far in advance: Prepare the Chantilly cream just before assembly for best results. If made ahead, it may need gentle re-whipping.
Storing Tips for the Recipe
The assembled cake is best enjoyed within 24 hours but will keep refrigerated for up to 3 days. Store in a cake keeper or loosely tent with foil, avoiding plastic wrap which can stick to the cream.
Unfrosted cake layers can be wrapped tightly in plastic wrap and frozen for up to 3 months. Thaw overnight in the refrigerator before assembling. This makes it easy to prepare components in advance for special occasions.
If you notice the Chantilly cream starting to weep after a day, gently blot excess moisture with paper towels and refresh the top layer with a small amount of freshly whipped cream before serving.
Conclusion
This glorious gluten-free Chantilly cake proves that dietary restrictions need never limit culinary excellence. The combination of tender cake, billowing cream, and fresh berries creates a dessert that’s both visually stunning and incredibly delicious.
The techniques you’ve learned here—from properly mixing gluten-free batter to creating stable whipped cream—transfer beautifully to other baking projects. You’ve mastered a sophisticated French-inspired dessert that happens to be gluten-free, rather than a compromised alternative.
Have you tried making this heavenly creation? I’d love to hear about your experience in the comments below! Share your berry combinations or any creative twists you’ve added to make this recipe your own. And if you’re looking for more gluten-free inspiration, be sure to check out my collection of seasonal desserts perfect for any occasion.