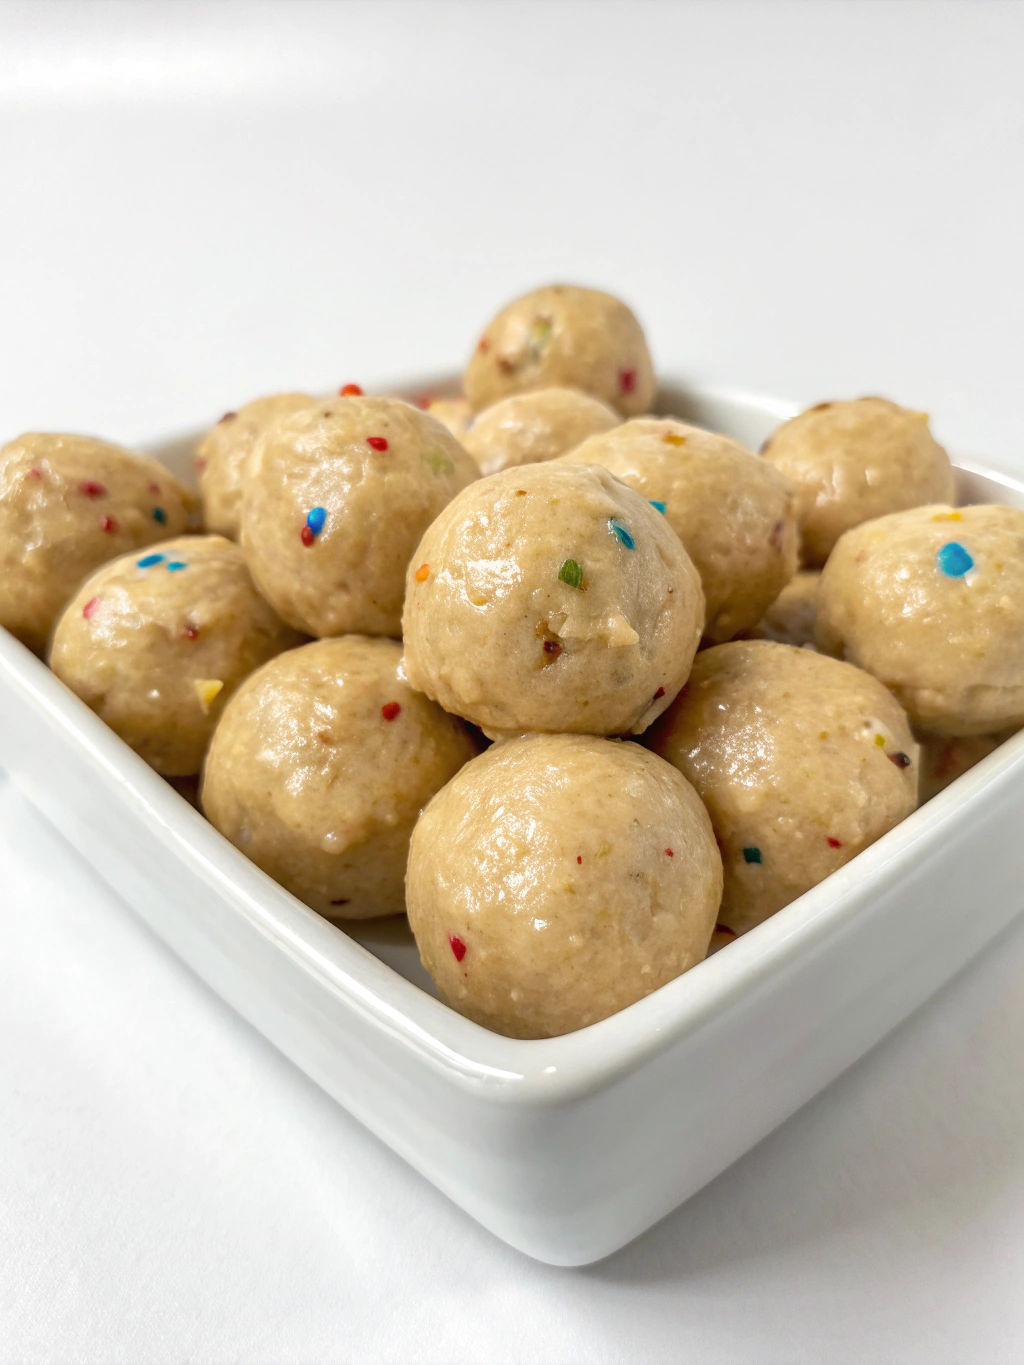
Cake Batter Protein Balls: A Healthy Treat That Tastes Like Dessert
Ever wondered if you could enjoy the irresistible flavor of cake batter without the guilt that comes with indulging in actual cake? What if there was a protein-packed snack that satisfied your sweet tooth while supporting your fitness goals?
These cake batter protein balls are the perfect solution for anyone craving something sweet but nutritious. In just 15 minutes, you can whip up a batch of these no-bake treats that taste like birthday cake but offer the benefits of a protein-rich snack. They’re perfect for on-the-go energy, post-workout recovery, or a guilt-free dessert alternative.
Ingredients List
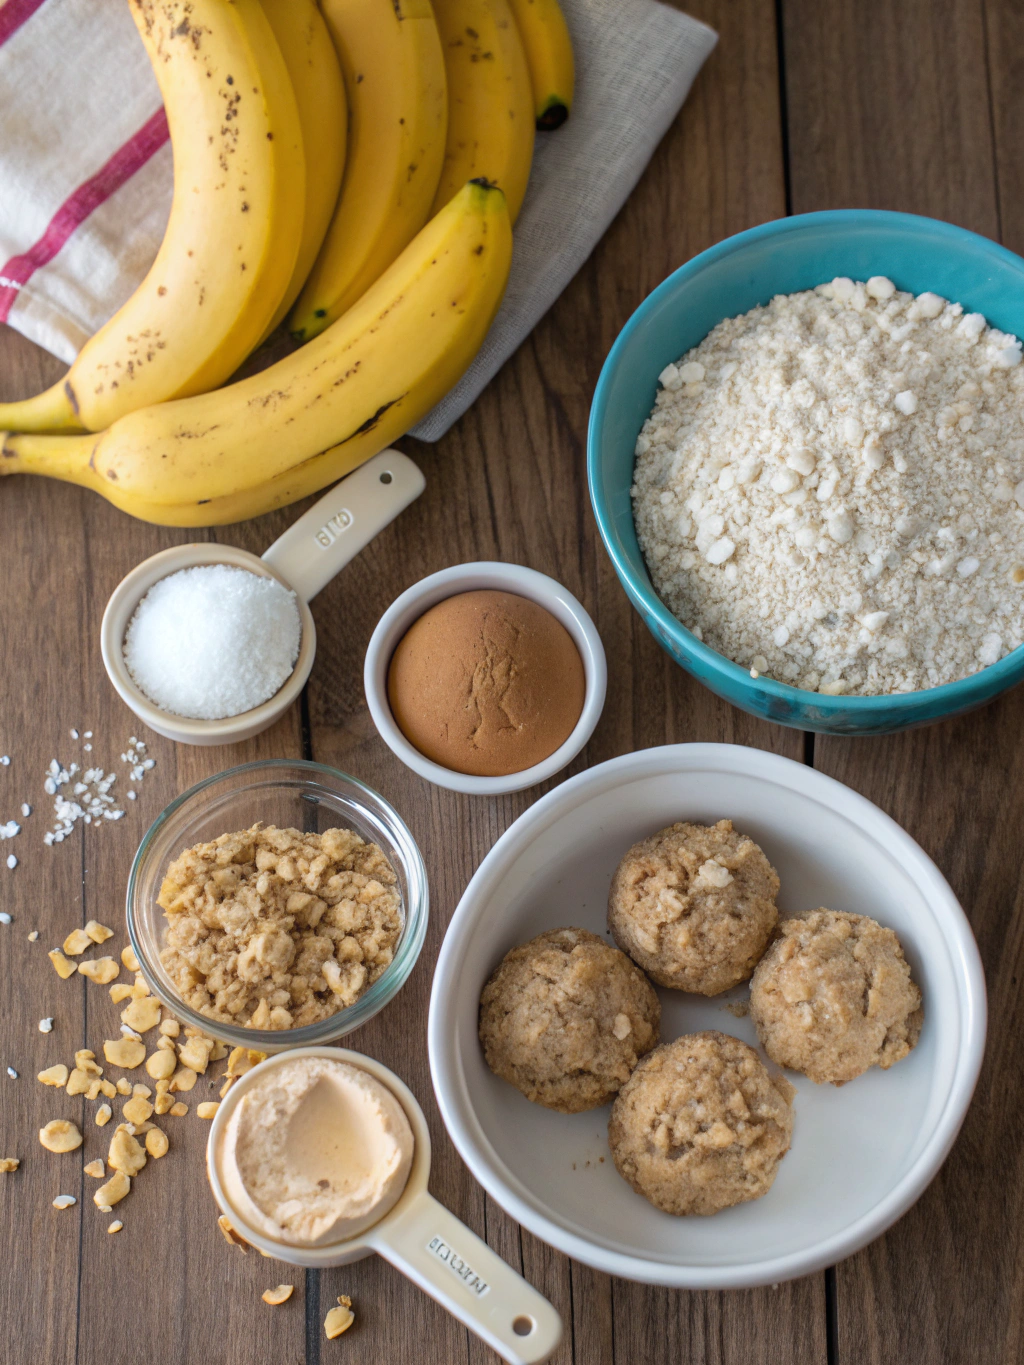
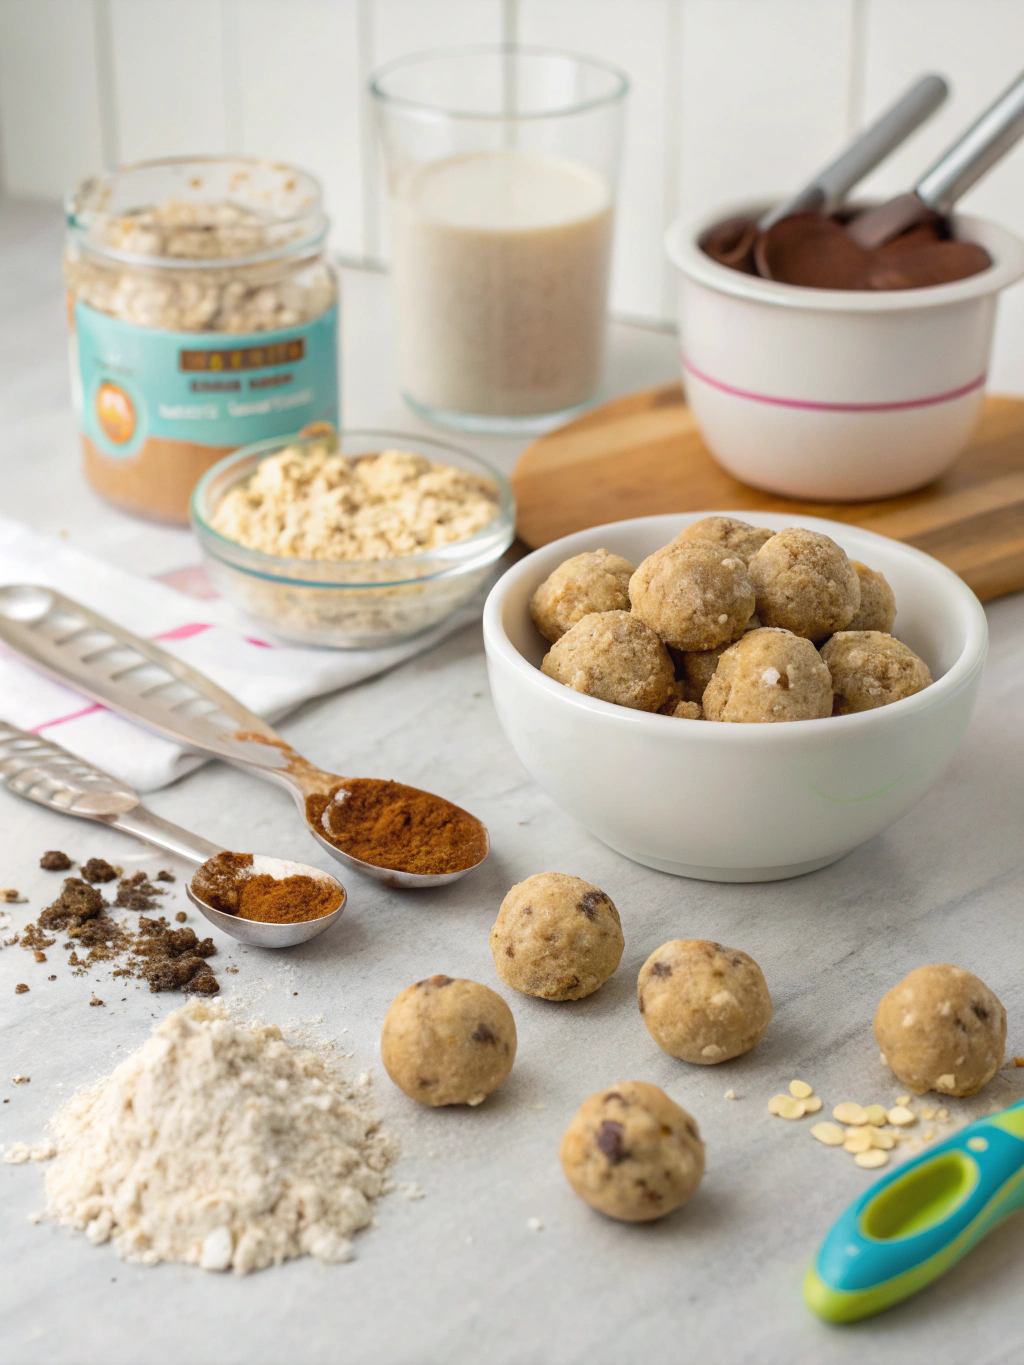
These delicious cake batter protein balls require simple ingredients you might already have in your pantry. Each component contributes to both the nostalgic cake batter flavor and the nutritional profile that makes these treats a smart choice.
- 1 cup oat flour (ground from rolled oats or store-bought)
- ½ cup vanilla protein powder (whey or plant-based)
- 3 tablespoons coconut flour
- ¼ cup almond butter (or cashew butter for a milder flavor)
- 3 tablespoons maple syrup (or honey)
- 1 teaspoon vanilla extract
- ¼ teaspoon almond extract (optional, enhances the cake batter flavor)
- 3-4 tablespoons almond milk (or any milk of choice)
- ¼ cup rainbow sprinkles (use naturally colored ones for a healthier option)
- Pinch of salt
For substitutions, consider sunflower seed butter if you have nut allergies, or replace the maple syrup with agave nectar for a different sweetness profile. The protein powder you choose will significantly impact the flavor, so select a high-quality brand you enjoy.
Timing
Preparation time: 15 minutes
Chilling time: 30 minutes (recommended but optional)
Total time: 45 minutes
These cake batter protein balls require no baking, making them 75% faster to prepare than traditional protein bars or baked protein snacks. The hands-on time is minimal, and most of the total time is passive chilling to help the balls firm up and enhance their flavor.
Step-by-Step Instructions
Step 1: Prepare Your Base
In a large mixing bowl, combine the oat flour, protein powder, coconut flour, and salt. Whisk thoroughly to remove any lumps and ensure even distribution of ingredients. This creates the foundation of your protein balls and ensures consistent texture throughout.
Step 2: Add Wet Ingredients
Add the almond butter, maple syrup, vanilla extract, and almond extract (if using) to the dry mixture. Begin to mix with a spatula or wooden spoon until the ingredients start to come together. The mixture will initially appear crumbly but will gradually form a more cohesive dough.
Step 3: Adjust Consistency
Add almond milk one tablespoon at a time, mixing after each addition, until the dough reaches a consistency that holds together when pressed but isn’t too sticky. Different protein powders absorb moisture differently, so you may need slightly more or less milk than specified.
Step 4: Fold in Sprinkles
Gently fold in the rainbow sprinkles, being careful not to overmix as this can cause the colors to bleed. The sprinkles not only add the classic cake batter appearance but also contribute to the authentic birthday cake flavor experience.
Step 5: Form the Balls
Using a tablespoon or small cookie scoop, portion out the dough and roll between your palms to form balls approximately 1-inch in diameter. If the mixture sticks to your hands, lightly dampen your palms with water or a small amount of coconut oil.
Step 6: Chill and Set
Place the formed protein balls on a parchment-lined plate or baking sheet and refrigerate for at least 30 minutes to firm up. This chilling period helps the flavors meld together and improves the texture, making them more satisfying to bite into.
Nutritional Information
Each cake batter protein balls (based on a yield of 12 balls) contains approximately:
- Calories: 110-130 calories
- Protein: 5-7g
- Carbohydrates: 10-12g
- Fiber: 2-3g
- Sugar: 4-5g
- Fat: 5-6g
These protein balls contain roughly 60% less sugar than a typical slice of birthday cake while providing 5 times more protein. They’re designed to provide sustained energy through a balanced combination of complex carbohydrates, healthy fats, and quality protein.
Healthier Alternatives for the Recipe
While these protein balls are already a nutritious alternative to traditional desserts, there are several ways to modify the recipe to suit specific dietary needs:
- For a lower-carb version, replace half the oat flour with almond flour and use a stevia-sweetened protein powder.
- Make them vegan by ensuring your protein powder is plant-based and using maple syrup instead of honey.
- For a nut-free option, substitute the almond butter with sunflower seed butter and use oat milk instead of almond milk.
- Reduce sugar content by using unsweetened protein powder and replacing half the maple syrup with mashed banana for natural sweetness.
- Boost the protein content by adding 1-2 tablespoons of collagen peptides to the dry ingredients.
Serving Suggestions
These versatile protein balls can be enjoyed in numerous ways to enhance your snacking experience:
- Pair with a small glass of almond milk for a satisfying afternoon pick-me-up that mimics the classic cake and milk combination.
- Serve alongside fresh berries for a balanced snack that combines protein, healthy fats, and antioxidants.
- Crumble over Greek yogurt for a protein-packed parfait that satisfies sweet cravings.
- Pack in your gym bag for a convenient post-workout recovery snack that helps rebuild muscle.
- Serve on a decorative plate with a birthday candle for a healthier birthday treat alternative that still feels special.
Common Mistakes to Avoid
- Using too much liquid – This makes the mixture too sticky to roll. Add liquid gradually, one tablespoon at a time, until you reach the right consistency.
- Skipping the coconut flour – This ingredient is crucial for absorption and texture. If you must substitute, use additional protein powder, but be aware the texture will be different.
- Overworking the dough – Excessive mixing can cause the sprinkles to bleed color and create a tougher texture. Mix just until combined.
- Using warm hands – If your hands are too warm, the mixture will stick. Rinse hands under cold water before rolling the balls to prevent sticking.
- Adding sprinkles too early – Fold them in as the last step to preserve their color and prevent them from dissolving into the mixture.
Storing Tips for the Recipe
Proper storage is key to maintaining the freshness and texture of your protein balls:
- Refrigerator storage: Place in an airtight container and refrigerate for up to 1 week. Separate layers with parchment paper to prevent sticking.
- Freezer storage: These protein balls freeze exceptionally well for up to 3 months. Freeze individually on a baking sheet before transferring to a freezer bag to prevent clumping.
- Room temperature: They can be kept at room temperature for up to 2 days if you prefer a softer texture, but refrigeration is recommended for food safety.
- Travel tips: For on-the-go snacking, wrap individually in parchment paper and store in a hard container to prevent squishing.
Conclusion
These delightful cake batter protein balls transform a classic dessert flavor into a nutritious, convenient snack that supports your health goals without sacrificing taste. With just 15 minutes of active preparation time, you can create a week’s worth of protein-rich treats that satisfy sweet cravings while providing sustained energy.
Have you tried making these cake batter protein balls? Share your experience in the comments below! Did you add any special ingredients or make substitutions that worked well? I’d love to hear how these protein-packed treats fit into your healthy lifestyle. And if you’re looking for more nutritious snack ideas, be sure to check out our other protein ball recipes!