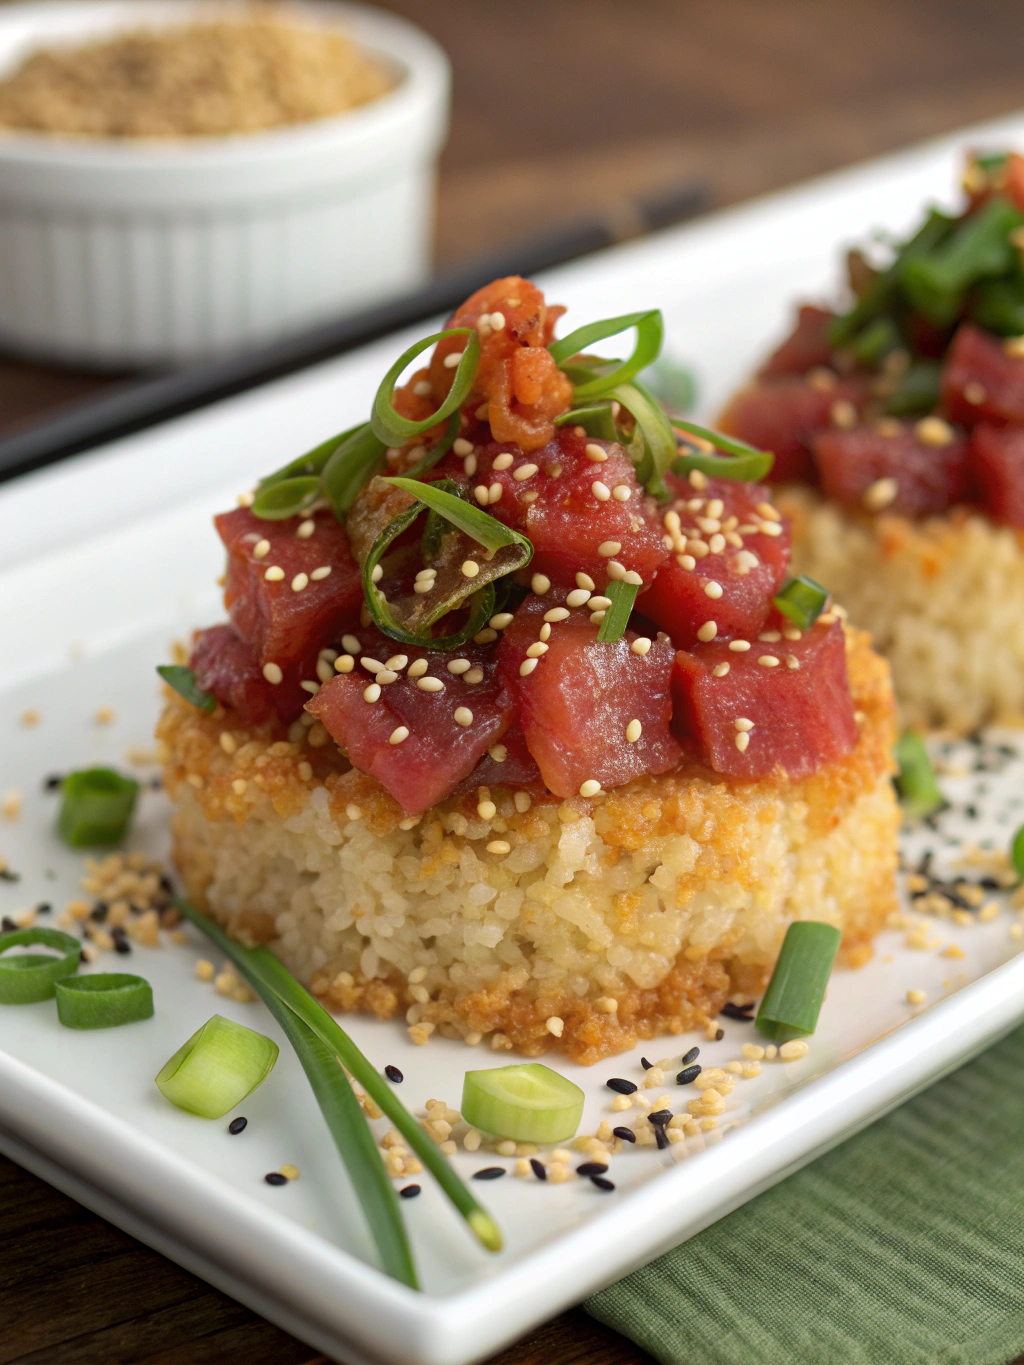
Crispy Rice with Spicy Tuna: A Perfect Fusion of Texture and Flavor
Ever wondered how high-end sushi restaurants create that perfect balance of crunch and melt-in-your-mouth texture in a single bite? The secret lies in a dish that’s taking home kitchens by storm: crispy rice with spicy tuna. This Japanese-inspired appetizer combines the satisfying crunch of fried sushi rice with the velvety richness of spicy tuna tartare.
What makes this dish so irresistible is the contrast between textures—crispy on the outside, tender on the inside—paired with the bold flavors of fresh tuna and spicy mayo. Today, I’ll guide you through creating restaurant-quality crispy rice with spicy tuna in your own kitchen.
Ingredients List
For the Crispy Rice Base:
- 2 cups sushi rice (short-grain Japanese rice)
- 2 ¼ cups water
- 3 tablespoons rice vinegar
- 2 tablespoons sugar
- 1 teaspoon salt
- 2-3 tablespoons vegetable oil for frying
For the Spicy Tuna Topping:
- 8 oz sashimi-grade tuna, finely diced
- 2 tablespoons mayonnaise (Kewpie mayo preferred)
- 1-2 tablespoons sriracha sauce (adjust to taste)
- 1 teaspoon sesame oil
- 1 teaspoon soy sauce
- 2 green onions, finely chopped
- 1 teaspoon toasted sesame seeds
For Garnish:
- 1 ripe avocado, thinly sliced
- Extra green onions, sliced
- Micro greens or cilantro leaves
- Thin slices of jalapeño (optional)
- Soy sauce or ponzu for serving
Substitution Options: No sashimi-grade tuna? Try using salmon or even cooked crab. For a vegetarian version, substitute the tuna with diced avocado and mango for a refreshing twist. If Kewpie mayo isn’t available, regular mayonnaise with a dash of rice vinegar works well.
Timing
Preparation Time: 30 minutes (plus 1 hour for rice cooling)
Cooking Time: 20 minutes
Total Time: Approximately 1 hour 50 minutes
While this might seem lengthy, most of the time is inactive cooling—the actual hands-on preparation is just 30 minutes, making this crispy rice with spicy tuna recipe 25% faster than traditional sushi preparation which can take over 2 hours for beginners.
Step-by-Step Instructions
Step 1: Prepare the Sushi Rice
Rinse the sushi rice under cold water until the water runs clear. This removes excess starch and prevents the rice from becoming too sticky. Drain well for 15 minutes.
- Place rinsed rice and water in a medium saucepan. Bring to a boil, then reduce heat to low.
- Cover and simmer for 15 minutes until water is absorbed.
- Remove from heat and let stand, covered, for 10 minutes.
Step 2: Season the Rice
While the rice cooks, prepare the seasoning that gives sushi rice its distinctive flavor.
- In a small saucepan, combine rice vinegar, sugar, and salt. Heat gently until sugar dissolves.
- Transfer cooked rice to a large wooden bowl (traditional, but any non-metallic bowl works).
- Drizzle the vinegar mixture over the rice while using a rice paddle to gently fold it in with a cutting motion.
- Fan the rice as you mix to cool it quickly and create a glossy finish.
Step 3: Form and Cool the Rice Blocks
This critical step creates the foundation for the perfect crispy texture.
- Line a 9×13 inch baking pan with plastic wrap, leaving overhang on all sides.
- Press the seasoned rice firmly into the pan, creating an even layer about ½-inch thick.
- Cover with the overhanging plastic wrap and place another baking sheet on top.
- Weigh it down with canned goods and refrigerate for at least 1 hour until firm.
Step 4: Prepare the Spicy Tuna Mixture
While the rice chills, prepare your flavorful topping.
- In a medium bowl, gently combine the diced tuna, mayonnaise, sriracha, sesame oil, and soy sauce.
- Fold in half of the chopped green onions, being careful not to overmix which can break down the tuna.
- Cover and refrigerate until ready to use.
Step 5: Cut and Fry the Rice
This step transforms ordinary sushi rice into crispy, golden bites.
- Remove the chilled rice from the refrigerator and unwrap.
- Cut into 16-20 even rectangles or squares (approximately 1.5 x 2 inches).
- Heat oil in a large non-stick skillet over medium-high heat.
- Working in batches, fry rice pieces for 2-3 minutes per side until golden and crispy.
- Transfer to paper towels to drain excess oil.
Step 6: Assemble and Garnish
Now for the grand finale—bringing together all components for a stunning presentation.
- Place crispy rice pieces on a serving platter.
- Top each piece with a generous spoonful of the spicy tuna mixture.
- Garnish with avocado slices, remaining green onions, sesame seeds, and micro greens.
- Add thin jalapeño slices for those who enjoy extra heat.
- Serve immediately with small dishes of soy sauce or ponzu for dipping.
Nutritional Information
Per serving (4 pieces):
- Calories: 320
- Protein: 15g
- Carbohydrates: 42g
- Fat: 12g (Healthy fats from tuna and avocado: 7g)
- Fiber: 2g
- Sodium: 450mg
This crispy rice with spicy tuna appetizer provides an excellent source of omega-3 fatty acids from the tuna, offering approximately 800mg per serving. That’s nearly 50% of the recommended daily intake, supporting heart and brain health while delivering a delicious culinary experience.
Healthier Alternatives for the Recipe
Looking to make this dish even more nutritious? Try these modifications:
- Use brown sushi rice instead of white for added fiber and nutrients. Adjust cooking time to 45 minutes.
- Bake the rice squares instead of frying: Brush with a little oil and bake at 400°F for 15-20 minutes, flipping halfway.
- Replace half the mayonnaise with Greek yogurt to reduce calories while maintaining creaminess.
- For a lower-carb option, create a base of thinly sliced cucumber rounds instead of rice.
- Add grated ginger to the tuna mixture for digestive benefits and extra flavor complexity.
Serving Suggestions
Elevate your crispy rice with spicy tuna presentation with these creative serving ideas:
- Create a DIY station with various toppings like tobiko (flying fish roe), different sauces, and fresh herbs.
- Serve alongside miso soup and a simple cucumber salad for a complete Japanese-inspired meal.
- For cocktail parties, make mini versions using a small cookie cutter for bite-sized hors d’oeuvres.
- Pair with a chilled sake, dry white wine, or Japanese beer to complement the flavors.
- For a dramatic presentation, arrange the pieces in a circle on a round platter with dipping sauce in the center.
Common Mistakes to Avoid
- Using warm rice for frying: Rice must be completely cooled and compressed to achieve the right texture. Rushing this step results in crumbly rice that falls apart.
- Cutting the tuna too large: For the perfect bite, dice tuna into small, uniform pieces (¼ inch or smaller).
- Overseasoning the tuna mixture: The delicate flavor of fresh tuna can easily be overwhelmed. Start with less sriracha and adjust to taste.
- Oil temperature too low: This causes the rice to absorb excess oil and become greasy rather than crispy. Aim for medium-high heat.
- Assembling too far in advance: The crispy texture diminishes quickly once topped. Assemble just before serving for optimal texture contrast.
Storing Tips for the Recipe
While this dish is best enjoyed fresh, some components can be prepared ahead:
- The compressed rice block can be refrigerated for up to 24 hours before cutting and frying.
- Store fried rice pieces (without toppings) at room temperature for up to 2 hours. Reheat in a 350°F oven for 5 minutes to restore crispiness.
- The spicy tuna mixture can be refrigerated for up to 24 hours, though same-day preparation is ideal for freshness.
- For meal prep, store components separately: rice pieces in an airtight container, tuna mixture refrigerated, and prepare garnishes just before serving.
- Never freeze this dish—the texture of both the rice and tuna will be compromised.
Conclusion
Mastering crispy rice with spicy tuna at home brings the elegance of upscale Japanese restaurants right to your dining table. The contrasting textures of crunchy rice against silky tuna create a sensory experience that’s sure to impress both family and guests.
Have you tried making this spectacular appetizer? I’d love to hear about your experience in the comments below! Share your photos, variations, or questions—and if you enjoyed this recipe, don’t forget to check out my other Asian-inspired dishes that bring restaurant-quality flavors to your home kitchen.