Delicious Protein Cake Balls: A Healthy Treat You Won’t Believe Is Good For You
Have you ever craved a sweet, indulgent treat but felt guilty about the empty calories? What if you could enjoy delicious cake-inspired bites that actually contribute to your daily protein intake? That’s exactly what protein cake balls offer – a perfect balance of flavor and nutrition.
These bite-sized delights have revolutionized healthy snacking. Made with protein powder, natural sweeteners, and wholesome ingredients, protein cake balls satisfy your sweet tooth while supporting your fitness goals. Let’s dive into this game-changing recipe that will transform your snack routine forever.
Ingredients List
Gathering the right ingredients is crucial for creating perfectly balanced protein cake balls that taste indulgent while packing a nutritional punch. Here’s everything you’ll need:
- 1 cup vanilla or birthday cake flavored protein powder (about 3-4 scoops)
- 1/3 cup almond flour (provides structure without heaviness)
- 3 tablespoons coconut flour (helps absorb moisture)
- 1/4 cup unsweetened almond milk (or any milk of choice)
- 3 tablespoons Greek yogurt (adds creaminess and extra protein)
- 2 tablespoons honey or maple syrup (for natural sweetness)
- 1 teaspoon vanilla extract (enhances the cake flavor)
- 1/4 teaspoon almond extract (optional, for depth of flavor)
- Pinch of salt (balances sweetness)
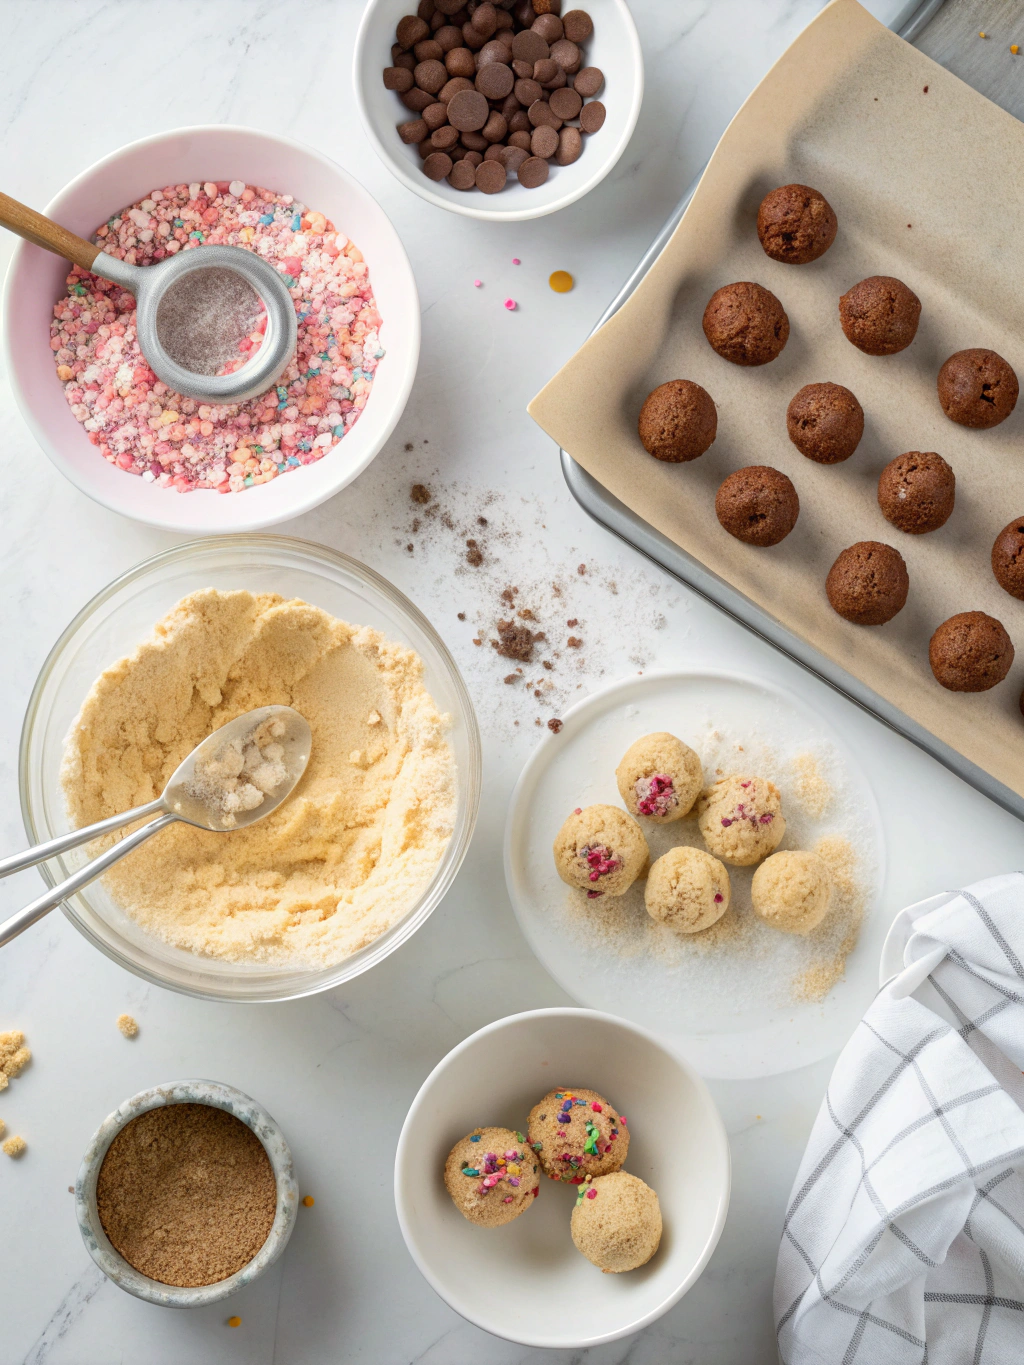
- 2-3 tablespoons rainbow sprinkles (for that authentic cake experience)
- 1/4 cup white chocolate chips, melted (for coating)
- Additional sprinkles for decoration
Substitution options: Use cashew flour instead of almond flour for a different flavor profile. Coconut yogurt works great for a dairy-free version. Monk fruit sweetener or stevia can replace honey for a lower-sugar alternative.
Timing
Preparation time: 15 minutes (mixing and forming balls)
Chilling time: 30 minutes (essential for proper texture development)
Coating time: 15 minutes
Total time: 60 minutes, which is significantly quicker than baking a traditional cake (typically 90+ minutes) while delivering similar satisfaction in bite-sized form.
Step-by-Step Instructions
Step 1: Combine Dry Ingredients
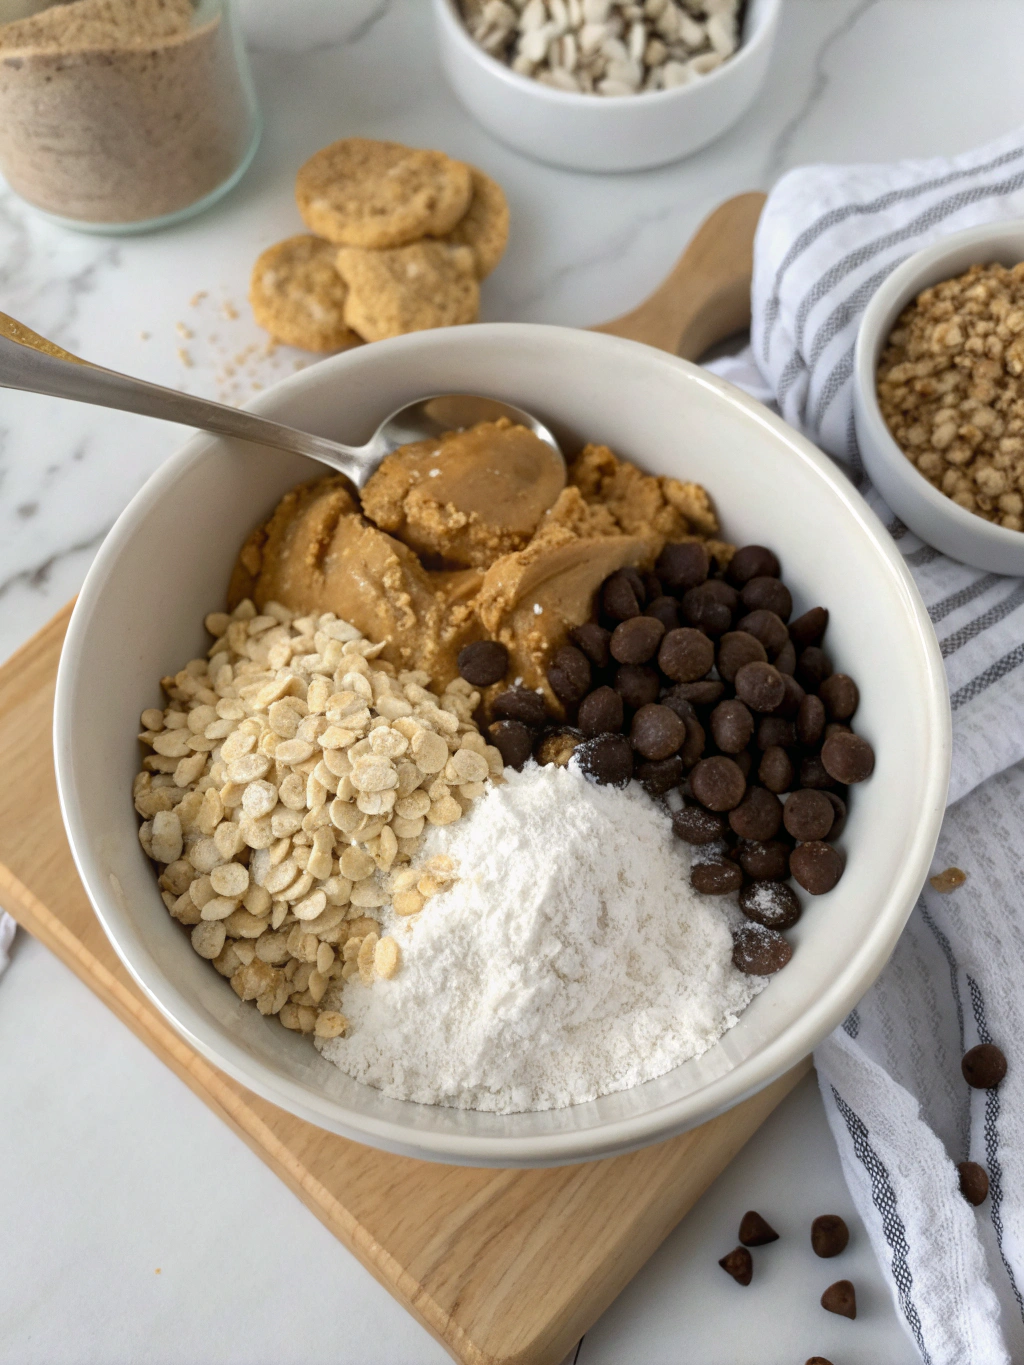
In a large mixing bowl, whisk together the protein powder, almond flour, coconut flour, and salt until well combined. Break up any clumps with your fingers for a smoother texture. This creates the perfect base for your protein cake balls.
Step 2: Add Wet Ingredients
Add the Greek yogurt, almond milk, honey or maple syrup, vanilla extract, and almond extract (if using) to the dry mixture. Stir gently with a spatula until the mixture starts to come together. The consistency should be similar to cookie dough – not too wet or too dry.
Step 3: Fold in the Sprinkles
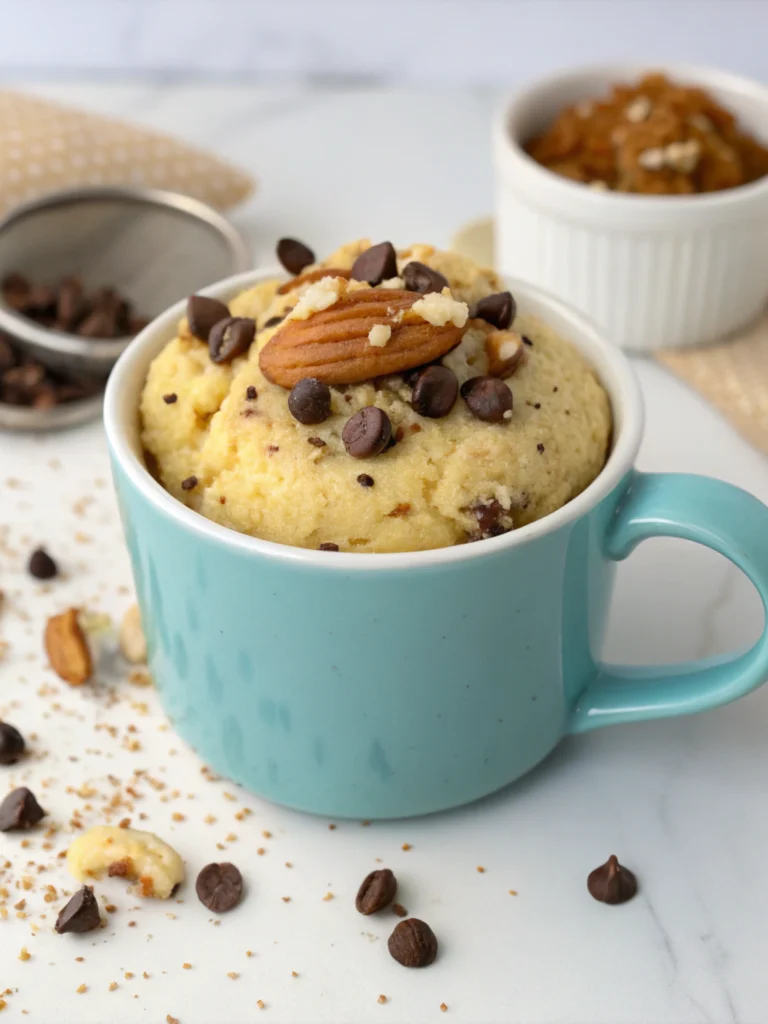
Gently fold in the rainbow sprinkles, being careful not to overmix as this can cause the colors to bleed. The sprinkles should be evenly distributed throughout the mixture, creating colorful specks that mimic birthday cake.
Step 4: Form the Balls
Using a tablespoon or small cookie scoop, portion out the mixture and roll between your palms to form smooth, even balls about 1-inch in diameter. You should get approximately 12-15 balls from this recipe. Pro tip: Slightly damp hands prevent sticking and create smoother balls.
Step 5: Chill
Place the formed balls on a parchment-lined baking sheet and refrigerate for at least 30 minutes. This crucial step helps them firm up and hold their shape. For best results, don’t skip this chilling period – patience yields perfect texture.
Step 6: Prepare the Coating
While the balls are chilling, melt the white chocolate chips in a microwave-safe bowl in 30-second intervals, stirring between each until completely smooth. Be careful not to overheat as white chocolate burns easily. Add a drop of coconut oil for smoother consistency if needed.
Step 7: Coat and Decorate
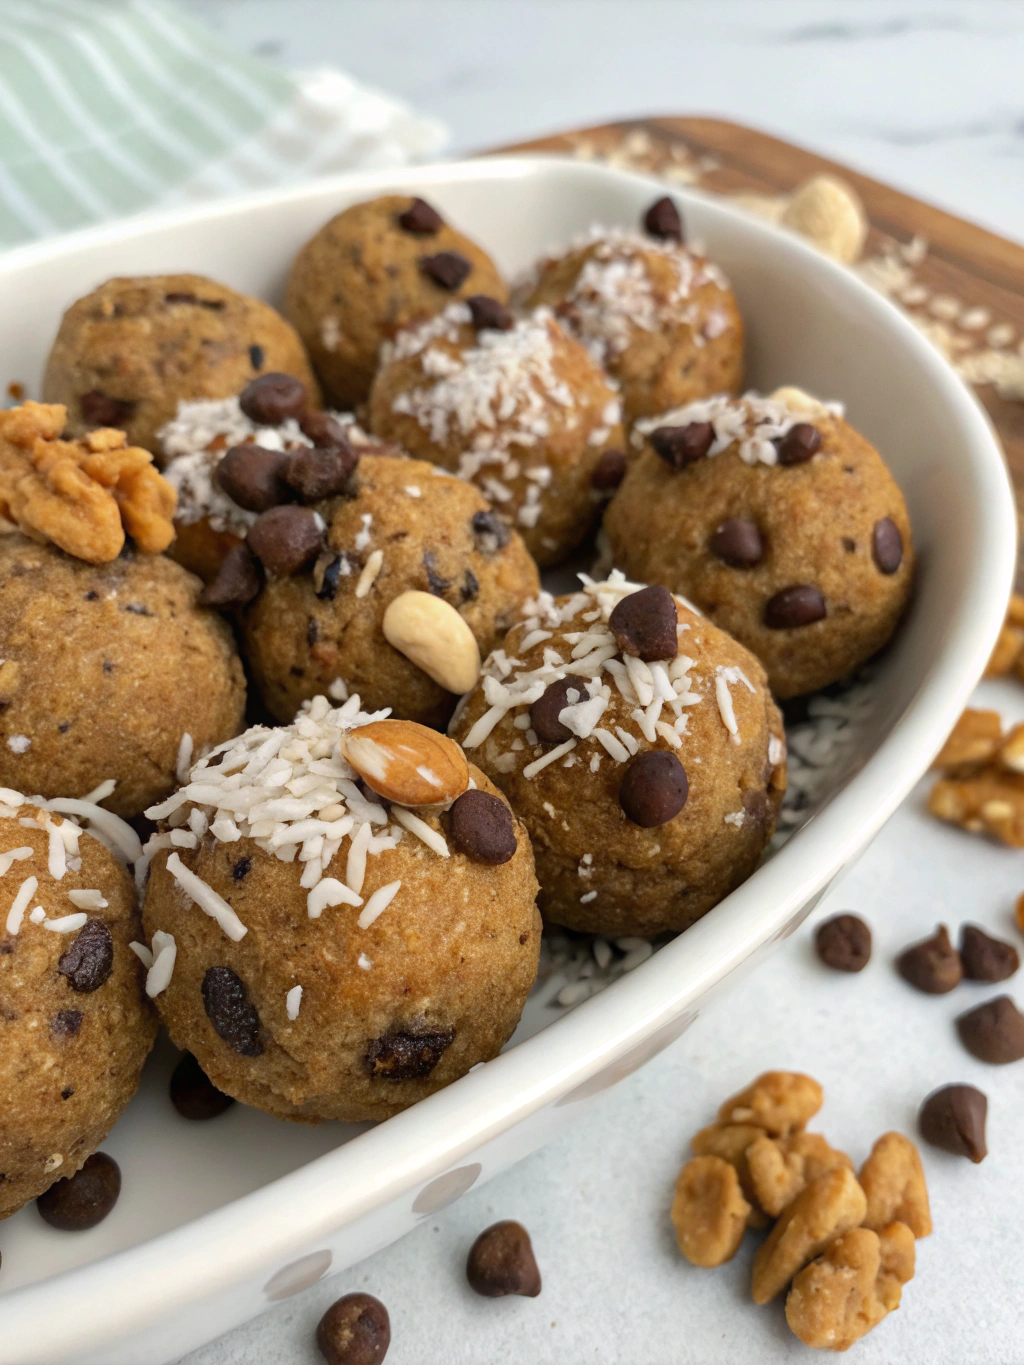
Remove the chilled protein balls from the refrigerator. Using two forks, dip each ball into the melted white chocolate, allowing excess to drip off. Place back on the parchment paper and immediately sprinkle with additional decorative sprinkles before the coating sets.
Step 8: Set and Store
Return the coated balls to the refrigerator for another 15 minutes to allow the chocolate to set completely. Once set, transfer to an airtight container for storage and enjoyment throughout the week.
Nutritional Information
Each protein cake ball (based on a yield of 14 balls) contains approximately:
• Calories: 110
• Protein: 7g
• Carbohydrates: 9g
• Fiber: 2g
• Sugar: 5g
• Fat: 5g
• Saturated Fat: 2g
These nutritional values represent a significant improvement over traditional cake balls, which typically contain 200-250 calories and only 1-2g of protein per serving. By making this switch, you’re getting 3-4 times more protein while consuming half the calories.
Healthier Alternatives for the Recipe
For an even more nutritious version, consider these modifications:
• Replace white chocolate coating with a mixture of coconut oil and vanilla protein powder for an extra protein boost.
• Use a plant-based protein powder and coconut yogurt to make these completely vegan-friendly.
• Swap regular sprinkles for naturally colored varieties made with vegetable dyes to avoid artificial colors.
• Add 1 tablespoon of ground flaxseed or chia seeds for additional omega-3 fatty acids and fiber.
• Incorporate 1 teaspoon of maca powder for adaptogenic benefits that support hormonal balance and energy.
Serving Suggestions
Elevate your protein cake ball experience with these creative serving ideas:
• Create a protein ball parfait by layering crumbled cake balls with Greek yogurt and fresh berries.
• Serve alongside your morning coffee as a balanced breakfast bite that won’t spike blood sugar like traditional pastries.
• Pack in lunchboxes as a nutritious dessert alternative that provides sustained energy for afternoon activities.
• Arrange on a decorative platter with fresh mint leaves for an impressive healthy dessert option at gatherings.
• Crumble over frozen yogurt for a protein-enhanced dessert that satisfies both sweet cravings and nutritional needs.
Common Mistakes to Avoid
- Using too much liquid: This makes the mixture too wet to form proper balls. Add dry ingredients gradually if your mixture becomes too sticky.
- Skipping the chilling step: This results in balls that fall apart when coating. Patient chilling creates the perfect texture.
- Overheating white chocolate: This causes it to seize and become unusable. Melt slowly and stir frequently.
- Using protein powder with artificial sweeteners: Some can create a bitter aftertaste. Test your protein powder first or opt for naturally sweetened varieties.
- Overmixing after adding sprinkles: This causes color bleeding. Fold gently just until incorporated for the prettiest results.
Storing Tips for the Recipe
Proper storage ensures your protein cake balls maintain optimal flavor and texture:
• Refrigerator storage: Keep in an airtight container for up to 1 week. Separate layers with parchment paper to prevent sticking.
• Freezer storage: These freeze beautifully for up to 3 months. Thaw in the refrigerator for 2 hours before enjoying.
• Meal prep advantage: Make a double batch on Sunday for quick, grab-and-go protein snacks all week long.
• Room temperature: Can be left at room temperature for up to 4 hours if you’re taking them to an event, but refrigeration is preferred for longer periods.
• Travel tip: Transport in a small cooler with an ice pack to maintain texture when bringing to gatherings or the gym.
Conclusion
These delightful protein cake balls represent the perfect marriage of indulgence and nutrition. By transforming a traditionally decadent treat into a protein-packed snack, you can satisfy your sweet tooth while supporting your health and fitness goals.
The versatility of this recipe allows for endless customization to suit your dietary preferences and flavor cravings. Whether you’re looking for a post-workout refuel, a healthier dessert option, or just a fun way to increase your protein intake, these colorful bites deliver on all fronts.
Have you tried making these protein-packed treats? Share your experience in the comments below! And if you enjoyed this recipe, be sure to check out our other healthy dessert alternatives that make nutritious eating a pleasure rather than a chore. Your body—and your taste buds—will thank you!