Deliciously Creamy Keto Ice Cream Bars: A Low-Carb Frozen Treat
Have you ever craved the sweet, creamy satisfaction of ice cream bars but felt guilty about breaking your keto diet? What if you could indulge in this frozen delight without the carb overload that typically comes with traditional ice cream?
Making your own keto ice cream bars at home is not only possible but surprisingly simple. These frozen treats deliver all the rich, creamy goodness you crave while keeping your carb count low. Perfect for hot summer days or as a guilt-free dessert any time of year, these bars will satisfy your sweet tooth without kicking you out of ketosis.
Let’s dive into creating these delectable frozen treats that will revolutionize your keto dessert game!
Ingredients List
Gather these simple, keto-friendly ingredients to create your perfect frozen treats:
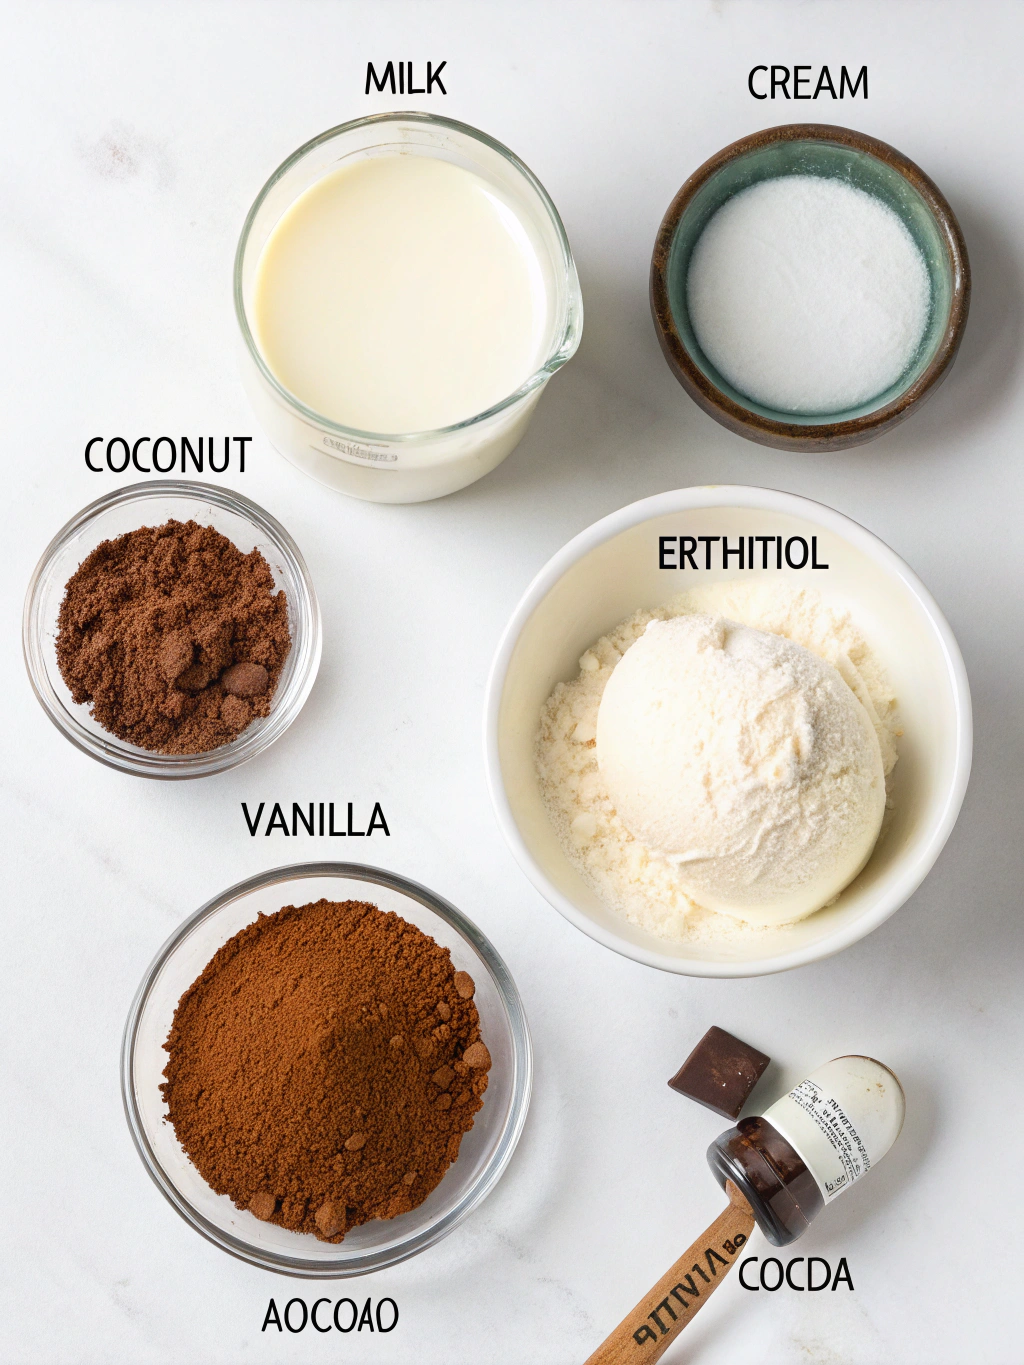
- 2 cups heavy cream (full-fat for ultimate creaminess)
- 1 cup unsweetened almond milk (coconut milk works too for a tropical twist)
- ⅓ cup powdered erythritol or monk fruit sweetener (adjust to taste)
- 3 tablespoons MCT oil or coconut oil (helps with texture and adds healthy fats)
- 2 teaspoons vanilla extract (pure, not imitation for best flavor)
- ¼ teaspoon xanthan gum (prevents ice crystals for smoother texture)
- ¼ teaspoon sea salt (enhances sweetness and balances flavors)
- Optional: 2 tablespoons unsweetened cocoa powder for chocolate version
- Optional: ¼ cup crushed keto-friendly nuts for added crunch
For substitutions, consider using coconut cream instead of heavy cream for a dairy-free option, or experiment with different flavor extracts like almond or mint to create variety in your keto ice cream bars.
Timing
Preparation time: 15 minutes (active mixing and preparing)
Freezing time: 4-6 hours (minimum) or overnight for best results
Total time: Approximately 4 hours and 15 minutes to 6 hours and 15 minutes
While traditional ice cream recipes often require constant churning and monitoring, these keto ice cream bars need just 15 minutes of active preparation—60% less hands-on time than conventional ice cream making methods. The freezing process happens while you attend to other activities!
Step-by-Step Instructions
Step 1: Prepare Your Equipment
Gather silicone popsicle molds or a loaf pan lined with parchment paper. If using a loaf pan, you’ll cut the frozen mixture into bars later. Ensure your freezer has adequate space and is set to the coldest setting for faster freezing.
Step 2: Create the Base Mixture
In a medium bowl, combine heavy cream and almond milk. Whisk gently until just combined, being careful not to whip too much air into the mixture, which can create ice crystals during freezing.
Step 3: Add Sweetener and Flavorings
Add your powdered sweetener, vanilla extract, and salt to the cream mixture. Whisk thoroughly until the sweetener is completely dissolved. If making chocolate bars, add cocoa powder at this stage and ensure it’s fully incorporated with no lumps.
Step 4: Incorporate Stabilizing Ingredients
Sprinkle xanthan gum over the surface of your mixture while whisking continuously to prevent clumping. Then add MCT oil or coconut oil and whisk until fully blended. These ingredients help create a smoother texture and prevent ice crystals from forming.
Step 5: Optional Add-ins
If using nuts or other keto-friendly mix-ins like unsweetened coconut flakes or sugar-free chocolate chips, fold them in gently now. For a marbled effect, reserve a small portion of the base mixture, add cocoa powder to it, then swirl it into the main mixture.
Step 6: Pour and Freeze
Pour the mixture into your popsicle molds, leaving about ¼ inch of space at the top as the mixture will expand slightly when frozen. Insert popsicle sticks. If using a loaf pan, pour the mixture in and cover with plastic wrap, pressing it directly onto the surface to prevent ice crystals.
Step 7: Freezing Process
Place your molds or pan in the freezer on a flat surface. For optimal texture, freeze for at least 4-6 hours or preferably overnight. The longer freezing time allows the flavors to meld and the texture to stabilize.
Step 8: Unmolding
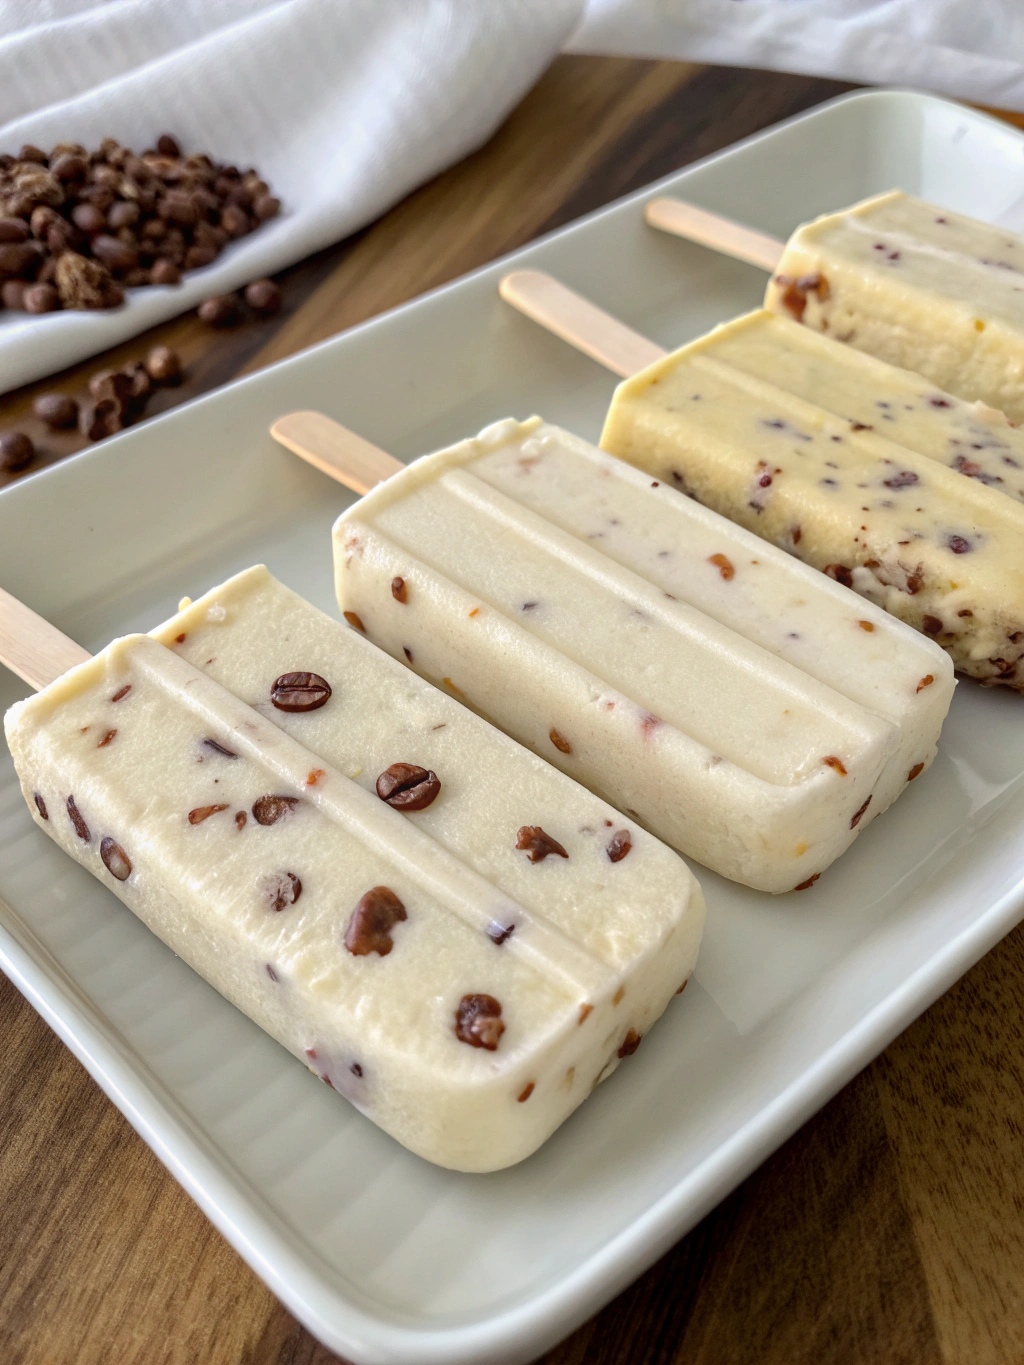
To remove bars from molds, run warm water over the outside of the mold for 10-15 seconds, being careful not to get water on the ice cream itself. Gently pull the bars out. If using a loaf pan, let sit at room temperature for 5 minutes, then lift out using the parchment paper and cut into bars with a warm knife.
Nutritional Information
Each keto ice cream bars (based on a recipe yielding 8 bars) contains approximately:
• Calories: 215 per bar
• Total Fat: 22g (92% of calories from fat)
• Total Carbohydrates: 2g
• Dietary Fiber: 0.5g
• Net Carbs: 1.5g
• Protein: 1.5g
• Sugar Alcohols: 5g (not counted in net carbs)
These bars contain 85% fewer carbs than traditional ice cream bars, which typically contain 15-20g of carbohydrates per serving. The high fat content makes these bars satisfying and helps maintain ketosis, while the minimal net carbs ensure they fit perfectly into your keto macros.
Healthier Alternatives for the Recipe
While this recipe is already keto-friendly, here are some modifications to suit various preferences:
• For dairy-free keto: Replace heavy cream with coconut cream and use coconut milk instead of almond milk.
• For higher protein: Add 2 tablespoons of unflavored whey protein isolate or collagen peptides to the base mixture.
• For lower calories: Use half heavy cream and half unsweetened almond milk for the cream portion.
• For natural sweeteners: Replace erythritol with stevia or monk fruit extract (adjust quantities according to sweetness levels).
• For added nutrients: Mix in 1 tablespoon of chia seeds or hemp hearts for omega-3 fatty acids and fiber.
Serving Suggestions
Elevate your keto ice cream bar experience with these creative serving ideas:
• Dip partially in melted sugar-free chocolate and sprinkle with crushed keto-friendly nuts for a gourmet touch.
• Serve alongside a small bowl of whipped cream with cinnamon for dipping.
• Create an ice cream sandwich by placing a bar between two small keto cookies.
• Drizzle with sugar-free caramel sauce made from butter, heavy cream, and keto sweetener.
• Pair with a shot of espresso for a sophisticated “affogato” dessert experience that’s still keto-compliant.
Common Mistakes to Avoid
- Over-churning the mixture: Excessive air incorporation leads to icier texture. Whisk gently just until ingredients are combined.
- Using granulated sweeteners: These don’t dissolve properly and create a gritty texture. Always use powdered forms for smooth results.
- Skipping the xanthan gum: This key ingredient prevents large ice crystals from forming. Without it, your bars may become too hard and icy.
- Impatient freezing: Removing bars before they’re completely set results in melty, structurally weak treats. Allow full freezing time.
- Using low-fat ingredients: Fat is essential for creamy texture in keto ice cream. Low-fat substitutions will result in icy, less satisfying bars.
Storing Tips for the Recipe
Proper storage is crucial for maintaining the quality of your keto ice cream bars:
Store unmolded bars in an airtight container with parchment paper between layers to prevent sticking. These will keep well for up to 2 weeks in the freezer.
For longer storage (up to 1 month), wrap each bar individually in parchment paper, then place in a freezer-safe zip-top bag with excess air removed.
Store at the back of the freezer where temperature is most consistent. Fluctuating temperatures can cause freezer burn and texture degradation.
If bars become too hard after extended storage, allow them to sit at room temperature for 3-5 minutes before enjoying for the best texture experience.
For make-ahead preparation, you can store the liquid mixture in the refrigerator for up to 24 hours before freezing if needed.
Conclusion
Creating your own keto ice cream bars at home opens up a world of guilt-free indulgence that perfectly aligns with your low-carb lifestyle. With just a few simple ingredients and minimal active preparation time, you can enjoy creamy, satisfying frozen treats that won’t compromise your ketosis.
The versatility of this recipe allows for endless flavor variations and customizations to suit your personal preferences and dietary needs. Whether you’re craving chocolate, vanilla, or something more adventurous, these bars deliver the perfect balance of richness and sweetness without the carb overload.
Have you tried making these keto-friendly frozen treats? Share your experience in the comments below, or tag us in your creations on social media! And if you enjoyed this recipe, be sure to check out our other keto-friendly dessert options that make staying on track deliciously easy.